Sunday, April 29, 2012

DIY :: stationary set

This weekend's DIY project is perfect for Mother's Day. There is nothing more personal than a custom stationary set complete with hand-dyed feather pens! For under $20 bucks you can create a magical gift that is one of a kind. Hey, you could make one for yourself cause it looks pretty amazing on your desk too!

SUPPLIES
feathers (I bought mine at Michaels)
pen inserts
rit dye - pick 3 colors that you love
mason jars or bowls to place the dye in
cardstock
envelopes
envelope liner template
double sided tape or gluestick

 Fill mason jars halfway with hot water and add your rit dye
 Place wet feathers into the jars, let stand for about 5 minutes. The longer the feathers sit, the more saturated the color will be!
 After you reach your desired color, flip the feathers over and soak the other half in a different color dye
 Remove the ink cartridge from a pen using needle nosed pliers, if you have em!
 Cut the pen to the length of the white stem of the feather
 Insert the pen into the feather and there you have it! Gorgeous hand dyed feather pens!
 Print your design and wrap it up!

Like us on Facebook and receive a free download of our navajo design!
XOXO

Saturday, April 28, 2012

superhero birthday party. . . boom

Being part of the "mom" squad means attending birthday parties for all of your friends' kids. Lucky for me, I am surrounded by amazingly talented friends who throw fantastic parties like this one! My dear friend Brooke, created this lovely superhero party for her son Quinn's 1st birthday. Nothing was left unmasked. . . all of the goodies were dressed in capes and masks and all of the kids received their very own super hero costume complete with their initial on the back. My daughter still runs around the house in complete super hero form. Thank you Brooke for this super fun party!


oh and p.s. look what made it's way onto a canvas and into our dining room. . .


photography by wild{whim}photography

Monday, April 23, 2012

iDiaries


thrift shop stops . father daughter festival time . crazy faces . ferris wheels . fur + gold fish . room service . rock stars . baby chucks . pug eyes . heart shaped glasses .

Sunday, April 22, 2012

peanut butter pretzel sandwiches


Salty and sweet. Nutty and delicious. Naughty and oh so nice. These little sandwiches are packed with a sugary potion that will blow your mind! I made a batch of these little devils for our recent road trip to the Coachella music festival. Perfect for snacking, dinner parties, and birthday surprises. . . these sandwiches are beyond divine. Go ahead, give your taste buds a chuckle!

INGREDIENTS:
1 cup creamy peanut butter
1/2 cup powdered sugar
3/4 cup brown sugar
1 bag of pretzel bites
1 bag of semi-sweet chocolate chips
salted pecan pieces
2 tbsp softened butter


Combine peanut butter and softened butter in a large bowl.  Add the sugars and mix to combine until dry enough to roll into a ball. If the filling sticks to your hands, add more sugar until you reach desired consistency. 


 Use a spoon to measure the filling.  Roll each portion into a small ball, then sandwich them between two whole pretzels thins.  Place the sandwiches on a parchment paper covered cookie sheet. Stick the whole tray in the freezer for about half an hour.


 Melt your chocolate chips in a small sauce pan over super low heat. Stir constantly until the chips are completely melted. Dip one end of each sandwich into the chocolate. Tap to remove excess chocolate and place back onto the parchment paper. If you are adding the pecan crust, sprinkle the pieces onto the top and allow to cool. Return the tray to the freezer to set up completely. Store in the fridge until you are ready to serve them!


Enjoy!!

// recipe adapted from two tiny kitchens //

Sunday, April 15, 2012

d.i.y. photo transfer

Get ready for one of my favorite d.i.y. projects ever!! Image transfers have been a fascination of mine for years. I love the beautifully weathered look of an imperfect print and the magic behind transferring that image onto the surface of your dreams! These prints make amazing gifts as well as decor for your home. My hope is to make about a dozen of these for my photo wall in the living room. I also had the idea of transferring an image inside of a serving tray to put on the coffee table! All you need to make these amazing pieces of art is a laser copy of your favorite snapshot, a piece of wood, and some matte medium. . .


STEP 1:
coat your wood canvas with matte medium. 
(be generous and coat your background evenly)

STEP 2:
press your laser copied photograph down making sure to smooth out any air bubbles.
let dry for several hours or overnight

STEP 3:
once completely dried, use a wet sponge and gently rub the paper off

STEP 4:
seal your revealed photo with some mod podge

beautiful photo of Berlin taken by the fantastic wild{whim}photography 

Sunday, April 8, 2012

recipe :: vegan chocolate cake


Who doesn't love chocolate cake?? This recipe is for the most amazing vegan chocolate cake that I have EVER had!! You would never know that it is dairy free. I hosted a girls' night at my place and knew that I wanted to make this delicious treat for my friends. I served it with wine, fresh sliced strawberries, and a sprinkle of powdered sugar to make it even more irresistible. . . make this for your next get together or party!!


Chocolate Cake
1 1/2 cups unbleached flour
1 cup sugar
3 tbs dutch cocoa powder
1 tsp baking soda
1 tsp vanilla extract
5 tbs vegetable oil
1 cup cold water
1 tbs white vinegar
1/2 cup vegan chocolate chips

Pre-heat oven to 350 degrees

Mix together flour, sugar, cocoa, and baking soda. 
Next, add the oil, vanilla, and water, mix well, add the vinegar last. 

Blend until creamy. Pour the batter into a greased 8x8 or 9x9 inch pan (I used a round spring form pan) and sprinkle the chocolate chips on top of the batter.

Bake at 350 degrees for 30-35 minutes or until center is done. 
Allow to cool then add chocolate frosting.

Home Made Chocolate Frosting 
3 tbs dutch cocoa powder (or 3oz unsweetened chocolate)
2 tsp vegan margarine
1/4 cup hot water or heated ricemilk
1 tsp vanilla extract
2+ cups of powdered sugar

Over low heat, melt the margarine + cocoa together. Add water + vanilla. Remove from heat and stir in the sugar until the frosting gets thick and creamy. 

(recipe from the amazing cookbook Rabbit Food. I bought mine from Anthropologie!!)

Saturday, April 7, 2012

aroma therapy


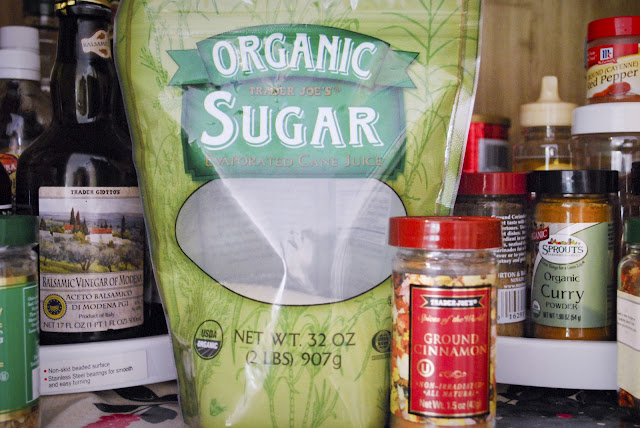
People coming over? Parents stopping by? Husband coming home from a long day at work? Trying to sell your home? These moments can give you that lump in your throat / panic attack because 2 minutes ago your dog was throwing up jelly beans all over your floor! Well, here is the BEST trick ever! All you need to do is sprinkle a little cinnamon and sugar in a small sauce pan and light it up! Cook this sweet mixture over low heat and within minutes your house will have that "what's in the oven?" aroma. Beware, it smells SO good that you may have a sudden craving for cake + cookies!

Friday, April 6, 2012

vegetarian patchwork pasta salad

By the end of the week, our fridge looks like a patchwork of leftovers! Time to get creative and pull together a fabulous meal to celebrate the weekend. We grabbed all of the fresh veggies that we had straggling around and the last box of pasta noodles that was hiding in the back of the pantry. Mixing them all together turned out to be a very happy medley of flavors and a guiltless night of grubbing! We think that the patchwork pasta is worth adding into our weekly meal plan. . . and it is great for lunch the next day too! Only if you don't eat the whole batch in one sitting like we did!


ONE
 cook and drain whole wheat pasta

TWO
 chop your organic veggies:
carrots
red onion
red bell pepper
fresh corn
peas
edamame

THREE
 saute veggies in a skillet over medium heat

FOUR
 add a little:
garlic
salt + pepper
extra virgin olive oil

FIVE
 toss veggies and pasta together, adding feta cheese (optional) and a little balsamic vinaigrette

enjoy!!


Thursday, April 5, 2012

the mystics cleanse

healthy. pure. natural. clean. happy. energy. glow. beauty. lovely
These are all words that describe the way that you should be feeling as you go about your day. If you aren't experiencing this, then pay attention. It is easy to add a simple smoothie into your daily routine to help heal and nourish your body from the inside out. We designed our own mystics cleanse to jumpstart our "spring cleaning". Packed with vitamins and minerals, these drinks give you a natural boost- that little hop in your step! Add them into your day and we promise that you will feel fitter, happier, and more productive. . . Our goal was to drink 3 juices, 3 times a day for 3 days, filling in the gaps with organic fruits and veggies! Easy enough right? 

P.S. We bought those cute little starbucks frapuccino bottles from costco to bottle our juices in. Trust us, it made them feel oh so fancy. . .


Here are a few of our favorite juice combos!!

{Greens}
spinach, kale, romaine, green apple, lemon

{Pre-Shred}
carrots, beets, apple, celery, apple, pear

{Post-Shred}
alkaline water, raw almonds, cinnamon, agave


adapted from the ritual cleanse

Wednesday, April 4, 2012

DIY :: easter eggs

Ok, people have been dying easter eggs forever!! And thanks to Martha Stewart, the egg has been adorned in sequins, glitter, paint, you name it, she has done it!! Did you see her egg GEODES? If you haven't check it out here. . .  amazing. We searched whole foods, the world market, and every drugstore and super market in town for the magic powder that we needed to make those gorgeous crystal eggs but came up empty handed. . .oh well. Plan B. We decided that we would go green and recycle the napkins from a birthday party that we threw a few weeks ago. We cut the napkins into small pieces and decoupaged them onto blown out eggs covering the entire egg with the fun patterns. For the left over eggs we made confetti out of tissue paper from our craft closet, poked holes in the tops of the eggs, and filled them with the confetti. We covered the holes with left over tissue and mod-podge. These eggs were super easy and fun, the perfect craft to do with the kids!! How did you decorate your eggs??


Supply List:
a dozen blown out eggshells (get the how-to here)
patterned napkins
craft scissors
tissue paper
mod podge
craft brush
hole punch for confetti

Sunday, April 1, 2012

bunny bark


We love holidays and birthdays because they give us a reason to go all out with sugar and candy!! Who doesn't love easter candy in those amazing pastel colors and cute bunny and chick shapes? Pick your favorite candies and get to work. . . bunny bark is super easy and makes a fun project for the kiddos. Package it up for your easter baskets or place it on a cute plate for your easter gathering, who wouldn't love an explosion of candy smothered on top of chocolate? 

step 1: pick your poison
Choose your favorite easter candies and chop them up into tiny pieces. We chose reese's peanut butter cups, mini marshmallows, easter sprinkles, and m+ms of course. If you buy the bags from the grocery store you will have left overs for your candy bowl or jar!
 step 2: create your foundation
Melt a bag of chocolates and a bag of pink chocolates in separate bowls according to the instructions on the package. Layout a piece of wax paper and pour the chocolate in a 1/4 inch thick layer. Add drops of the pink on top. Take a knife and draw a line straight through the pink to create "heart" shaped swirls in the chocolate. We had left over pink chocolate so we made a mini batch of pink bark on another piece of wax paper. . . we wouldn't want any to go to waste!!
step 3: sprinkle time
Sprinkle your toppings onto the chocolate until you are satisfied with your bark coverage.
Allow your bark to set for 3 hours before cutting into it.
step 4: break time 
When the bark is completely cooled start breaking it apart- get crazy with it!
That's it!! Enjoy this little bunny treat with your friends and family. 
Watch out- this can lead to a serious sugar buzz!!